Be honest. When you picture a handmade dog bed, do you see a lumpy rectangle with wobbly seams and a zipper that gave up halfway? I did too. My first attempt looked like a sad pillowcase. My dog, Biscuit, slept on it anyway, but my pride took a hit.
Then I learned a few tricks. Now friends ask where I bought my sewing projects, and I just grin. Here’s what I’d tell you over coffee.
What Makes a Dog Bed Sewing Pattern Look Store-Bought?
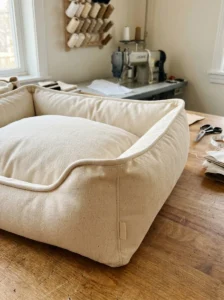
It’s rarely the pattern itself. It’s the little finishing stuff. Crisp corners. Even stitching. A fabric that isn’t fighting the shape.
Three things make the biggest difference:
Piping. That thin cord along the edges gives a bed structure and a tailored look. It’s easier than it sounds, and it hides a lot of sins.
Fabric weight. Thin cotton wrinkles and sags. Go for canvas, duck cloth, or upholstery-weight fabric. Dogs are rough on things, so sturdy fabric lasts longer anyway.
Fill that holds its shape. Cheap loose stuffing clumps after two washes. Use a solid foam insert or good polyester fiberfill and stuff more than feels reasonable.
Okay. On to the ideas.
The Eight Patterns
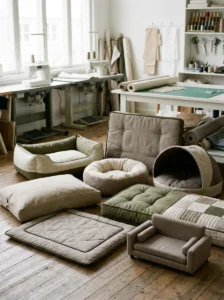
1. The classic bolster bed. Raised sides all the way around, so your dog can rest a chin on the edge. It’s the one that screams “bought it,” and it’s mostly straight lines. Beginners can handle it.
2. The flat mat with piped edges. Simple, slim, and great for crates or car trips. Add piping in a contrast color and suddenly it looks like it came from a boutique.
3. The envelope-back cushion cover. No zipper. Two overlapping fabric panels on the back, and the insert slips right in. When the cover’s dirty, you pull it off and toss it in the wash. This is my favorite for anyone who hates zippers.
4. The donut cuddler. Round, plush, and ringed with a thick border. Some dogs love the nest feel, and small breeds especially seem to curl right in. The trick is sewing curves slowly. Clip the seam allowance so it lies flat.
5. The tufted mattress bed. Buttons pulled through the cushion give it that fancy sofa look. Use a long upholstery needle and strong thread. But skip the buttons if your dog chews. Sew simple stitched tufts instead, so there’s nothing to swallow.
Here’s a surprising tip that changed my sewing: wash and dry your fabric before cutting anything. Yes, even if it feels like a waste of time. Fabric shrinks. A bed that fits perfectly and then shrinks into a weird little shape after the first wash is the number one reason homemade beds look homemade. Do it once and you’ll never skip it again.
6. The cave bed. A hooded design with a roof, perfect for dogs who like to burrow. It takes a little more patience, and you’ll need a stiffer fabric or interfacing in the hood so it doesn’t flop. Worth it, though. Some dogs find these cozy and secure.
7. The patchwork scrap bed. Sounds the most homemade, right? But patchwork done in a limited palette, say three colors, looks deliberate and cool. Use up leftover canvas pieces and save money at the same time.
8. The sofa-style bed. Three raised sides and an open front, like a tiny couch. It’s a bigger project, but it looks the most like furniture. Perfect for a living room where you care how things look.
Mistakes That Give It Away
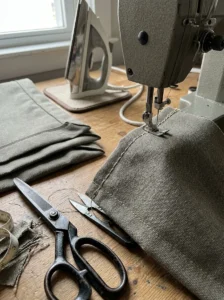
Even a great pattern can look sloppy. Watch for these.
Skipping the iron. Press every seam as you go. Flat seams look professional. Puckered ones don’t.
Using the wrong thread. Regular thread snaps under a dog’s weight and claws. Heavy-duty or upholstery thread costs a bit more and holds up far better.
Ignoring the stitch length. Go a little longer, around three millimeters, on thick fabric. Tiny stitches on canvas can actually weaken it.
And leaving raw edges inside. Dogs dig and scratch. Finish those inner seams with a zigzag stitch so nothing unravels after a few months.
A quick safety note: check your finished bed for loose threads, buttons, or stuffing that could be chewed and swallowed. If your dog is a chewer, stick with tight stitching and skip decorations. And if your dog is older or has trouble getting comfortable, your vet can tell you whether a thicker, more supportive bed makes sense.
Common Questions
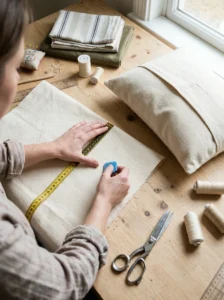
How much fabric do I need? Measure your dog stretched out, then add six to eight inches. That’s your finished length. Add extra for seams and for the sides if you’re making a bolster.
What’s the easiest pattern for a beginner? The envelope-back cushion cover. No zipper, mostly straight lines, forgiving if your seams aren’t perfect.
Can I wash it? Make sure the cover comes off. Washing the whole bed can ruin the filling, and nobody wants a soggy bed drying for two days.
So here’s your homework. Pick one of these eight and give it a try this weekend. Start small. Pre-wash that fabric. Press those seams. A dog bed sewing pattern doesn’t have to look homemade, and with a little patience yours won’t. Which one are you making first? And if you want more cozy DIY projects for your pup, my post on easy crate covers is a great next stop.