I avoided nail trimming for longer than I’d like to admit when Bruno was a puppy, genuinely intimidated by the idea of accidentally hurting him. Looking back, that avoidance probably made the eventual learning process harder than it needed to be, since neither of us had built up any tolerance or routine around it. This guide is what I wish I’d had from the start — practical, honest, and focused on actually building confidence rather than just technique alone.
(I’m an experienced dog owner, not a veterinarian or professional groomer. If you’re genuinely uncomfortable attempting this, or your dog has very dark nails making the quick especially hard to judge, a vet or professional groomer can demonstrate the technique safely, or simply handle this task for you.)
Why Regular Nail Trims Matter
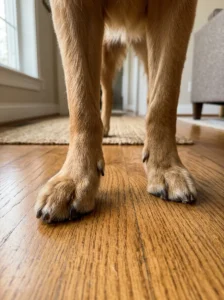
Overgrown nails aren’t just a cosmetic issue — they can affect your dog’s gait and posture, since overly long nails change how a dog’s foot naturally contacts the ground, sometimes contributing to discomfort or even longer-term joint stress. Overgrown nails are also more prone to painful breaks or splits, and in severe cases, can curve around and grow into the paw pad.
Understanding the Quick
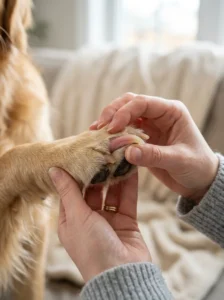
This is the part that intimidates most new owners, myself included early on. The “quick” is the blood vessel and nerve running through the center of each nail. Cutting into the quick causes bleeding and discomfort for your dog, though it’s rarely a serious emergency — more a startling, briefly painful moment than genuine harm.
For light-colored nails, the quick is usually visible as a pink area within the nail, making it easier to identify where to safely trim.
For dark nails, where the quick isn’t visible, trimming smaller amounts more frequently is the safer approach, rather than guessing at a larger cut.
Tools: Clippers vs. Grinders
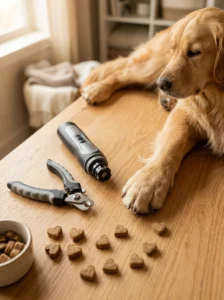
Guillotine-style or scissor-style clippers are the traditional option, generally quick once you’re comfortable with the technique, though they do involve a clean, immediate cut that some dogs find startling.
Nail grinders file the nail down gradually rather than cutting it, which some owners and dogs find less intimidating, since there’s less risk of a sudden cut, though the sound and vibration of a grinder takes some dogs time to adjust to as well.
Neither tool is universally “better” — it genuinely comes down to what you and your specific dog tolerate better, and some owners use both, depending on the situation.
Step-by-Step: How to Trim Nails Safely

1. Choose a calm moment, ideally after some exercise when your dog is naturally a bit more relaxed, rather than attempting this when they’re highly energetic or anxious.
2. Get your dog comfortable with paw handling first, especially if this is new — gently holding and touching paws regularly, separate from actual trimming, builds tolerance before you ever introduce the clippers.
3. Hold the paw gently but securely, with your thumb on the pad and fingers on top, extending the nail slightly without squeezing uncomfortably.
4. Identify the quick if visibleI, and trim just before it, at a slight angle following the natural curve of the nail.
5. Trim small amounts at a time, especially for dark nails, checking the cut surface after each small trim — a slightly grayish or pink dot appearing in the center of the cut surface signals you’re approaching the quick and should stop.
6. Reward generously throughout, not just at the very end, helping build a positive association with the entire process, not just relief when it’s over.
7. Don’t feel obligated to do all nails in one session. If your dog seems stressed partway through, stopping and continuing later (or the next day) is completely reasonable, and often produces a better long-term experience than pushing through a single tense session.
What to Do If You Nick the Quick
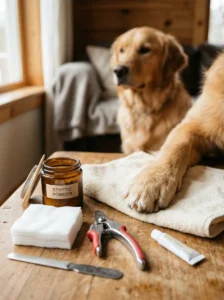
This happens to even experienced owners occasionally, and it’s worth being prepared rather than panicking if it does.
Apply styptic powder directly to the nail, which helps stop bleeding quickly. If you don’t have styptic powder on hand, cornstarch or flour can work as a temporary substitute in a pinch.
Apply gentle, steady pressure for a few moments if bleeding doesn’t stop immediately with the powder alone.
Stay calm yourself — your dog will pick up on your energy, and a calm, reassuring response helps minimize how stressful the moment feels for them, supporting a better association with future trims rather than reinforcing fear.
This typically isn’t a serious emergency, though if bleeding doesn’t stop within several minutes despite styptic powder and pressure, or if your dog seems to be in significant ongoing pain, a call to your vet is reasonable.
How Often Nails Actually Need Trimming
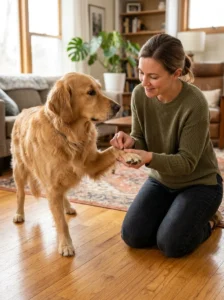
This varies based on your dog’s activity level and the surfaces they regularly walk on. Dogs who walk frequently on hard, abrasive surfaces like pavement may naturally wear down their nails somewhat between trims, while dogs primarily on softer surfaces like grass or carpet typically need more frequent trimming, often every 2-4 weeks.
A simple test: if you can hear your dog’s nails clicking audibly on hard flooring, they’re likely due for a trim.
Building Long-Term Tolerance, Not Just Surviving Each Session

Beyond the mechanical technique, the bigger long-term goal is building genuine tolerance and ideally comfort with this routine task. This came together for both Bruno and Mishi through consistent, positive, low-pressure practice — regular paw handling outside of actual trimming sessions, treats throughout (not just as a reward at the end), and accepting that early sessions might be imperfect without that meaning we were doing something fundamentally wrong.
When Professional Help Makes Sense

There’s no shame in relying on a groomer or vet for this specific task, particularly if your dog has a strong fear response that home practice hasn’t resolved, if you have a dog with notably dark nails and genuine uncertainty about quick location, or if you simply prefer the peace of mind of professional handling for this one task while managing other grooming at home yourself.
Nail Trimming for Senior Dogs: Special Considerations
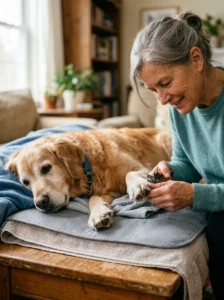
As dogs age, nail trimming can become more complicated for a few reasons worth knowing about. Senior dogs sometimes have thicker, more brittle nails that require sharper, well-maintained clippers to cut cleanly rather than crushing. Joint stiffness or arthritis, covered in our joint health guide, can make certain positions uncomfortable, meaning patience with positioning matters even more than with a younger, more flexible dog. We’ve found that doing Mishi’s nail trims in shorter sessions, sometimes just one or two nails at a time across several days, works better for her comfort than our previous approach with a younger, more flexible Bruno.
The Connection Between Nail Length and Gait
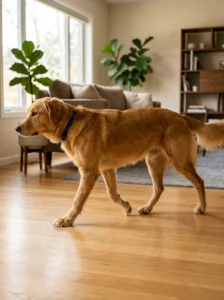
Understanding this connection helped me take nail trimming more seriously as a genuine health practice, not just routine maintenance. Overly long nails force a dog’s toes into an unnatural position when bearing weight, which over time can affect how weight distributes across their feet and, in more significant cases, contribute to changes in gait that place additional stress on joints further up the leg. This is part of why veterinarians and physical therapists who work with dogs sometimes specifically evaluate nail length as part of assessing gait-related concerns, reinforcing that this routine task carries genuine biomechanical importance beyond simple cosmetic maintenance.
Building Nail Trimming Into a Broader Paw Care Routine

Rather than treating nail trims as an isolated task, we’ve found it efficient and less stressful for both dogs to combine nail trimming with the paw pad inspection and cleaning covered in our muddy paws guide, treating the whole paw as one coordinated care routine rather than separate, disconnected tasks requiring separate handling sessions.
What I Wish I’d Known About Quick Length Before Starting
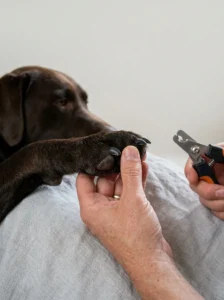
One thing that would have genuinely helped me feel more confident early on: the quick actually recedes somewhat when nails are kept consistently trimmed short, meaning regular, frequent small trims gradually allow for shorter overall nail length than infrequent larger trims would achieve. This is part of why a consistent every-2-4-week schedule tends to produce better long-term results than waiting until nails are visibly very long before attempting a single large trim, which both increases quick-nicking risk and doesn’t allow the quick the opportunity to gradually recede with consistent shorter maintenance.
Nail Trimming Across Different Breeds and Paw Sizes

It’s worth noting that technique and tool sizing genuinely differs based on your dog’s size and nail thickness. Small breeds typically have thinner, more delicate nails requiring smaller clippers and gentler pressure, while large breeds often have thicker nails that may need sturdier tools and sometimes more deliberate pressure to achieve a clean cut. If you have multiple dogs of different sizes, as we do, having appropriately sized tools for each, rather than using a single one-size-fits-all clipper, makes the process more comfortable and effective for both dogs.
A few quick answers: How short should I actually cut my dog’s nails — The goal is trimming just before the quick, leaving enough nail that your dog can walk comfortably without the nail touching the ground when standing, which for most dogs means the nail tip stops just short of where the paw pad ends.. My dog won’t let me anywhere near their paws — what do I do — Start with very gradual, positive paw handling completely separate from actual trimming, building tolerance over days or weeks before introducing clippers at all, and consider working with a trainer if fear seems particularly significant.. Is it true that dewclaws need trimming too — Yes, if your dog has dewclaws (the higher, thumb-like nail on the inner leg), these still grow and need regular trimming since they don’t naturally wear down through walking the way other nails might.. Can overgrown nails actually cause health problems — Yes — beyond discomfort, significantly overgrown nails can alter gait, contribute to joint stress over time, and in severe cases curl and grow into the paw pad, making regular trimming a genuine health consideration, not just a cosmetic one..
Building real confidence with nail trimming took longer for me than I expected, but looking back, the patient, gradual approach genuinely paid off — both Bruno and Mishi now tolerate this routine task without the dread I initially worried about. If you’re where I was early on, intimidated and avoiding it, I’d encourage starting small and patient rather than continuing to put it off, since the avoidance itself tends to make the eventual learning curve steeper.
For more on building a complete grooming routine, our guides on the complete grooming guide and grooming tools every owner should own are excellent next reads.